| ✨Hey there! This post may contain affiliate links, meaning we earn a commission if you make a purchase through our links, at no cost to you. Please read our disclosures for more info. |
Quick answer: to dry herbs, harvest healthy stems just before the plant flowers, rinse and pat them completely dry, then use the method that fits the herb. Low-moisture herbs such as oregano, thyme, rosemary, dill and bay air dry well in small bundles hung upside down in a warm, dark, airy room. High-moisture herbs such as basil, mint, lemon balm, chives and tarragon dry better quickly in a dehydrator, because slow drying can let them mold, according to the National Center for Home Food Preservation. Herbs are done when leaves crumble easily. Store whole leaves in airtight containers away from light and heat, and use them within about a year for the best flavor.
Drying herbs is one of the oldest ways to keep the flavor of summer through the winter. It takes little equipment, and a single overgrown pot of oregano or a big bunch of thyme from the market can fill a spice jar.
Each herb behaves a little differently, though, and the wrong method can leave you with moldy bundles or brown, flavorless dust. This guide walks through four drying methods, how to store the results, and simple ways to keep fresh herbs longer. For an overview of cooking with herbs, brewing tea and growing your own, see our beginner’s guide to herbs.
Sources: National Center for Home Food Preservation (NCHFP), University of Georgia, “Drying Herbs”; USDA and cooperative extension guidance on preserving herbs (University of Minnesota Extension, Penn State Extension, Colorado State University Extension); NCHFP and USDA guidance on herbs and garlic in oil. Checked October 2026.

When to Harvest Herbs for Drying
The best time to harvest herbs for drying is just before the plant begins to flower, when leaves usually hold the most aromatic oils. Cooperative extension guides commonly recommend picking in the morning after dew has dried but before the heat of the day.
Harvesting tips
- Choose healthy stems with no yellowing, spots or insects.
- Cut stems rather than pulling leaves, leaving enough of the plant to regrow.
- Take no more than about one-third of a plant at once.
- Harvest only what you can process the same day.
Cleaning
Rinse herbs gently in cool water to remove dust and insects, then shake off the water and pat dry with clean towels. Wet leaves dry slowly and are more likely to mold, so let them air dry on towels for a short time before you start.

Which Herbs Dry Well, and How
Herbs fall into two broad groups based on how much moisture their leaves hold. The NCHFP notes that low-moisture herbs air dry well, while high-moisture herbs can mold if dried slowly and are better dried quickly.
| Herb | Moisture level | Best methods |
|---|---|---|
| Oregano | Low | Air drying, dehydrator |
| Thyme | Low | Air drying, dehydrator |
| Rosemary | Low | Air drying, dehydrator |
| Dill | Low | Air drying, dehydrator |
| Bay leaves | Low | Air drying, dehydrator |
| Marjoram | Low | Air drying, dehydrator |
| Sage | Medium | Air drying in small bundles, dehydrator |
| Basil | High | Dehydrator, freezing |
| Mint | High | Dehydrator, paper bag method |
| Lemon balm | High | Dehydrator |
| Chives | High | Freezing is often better than drying |
| Tarragon | High | Dehydrator |
| Parsley | Medium | Dehydrator, freezing |
Some herbs, like chives and basil, lose much of their flavor when dried. Freezing often preserves them better.

Method 1: Air Drying
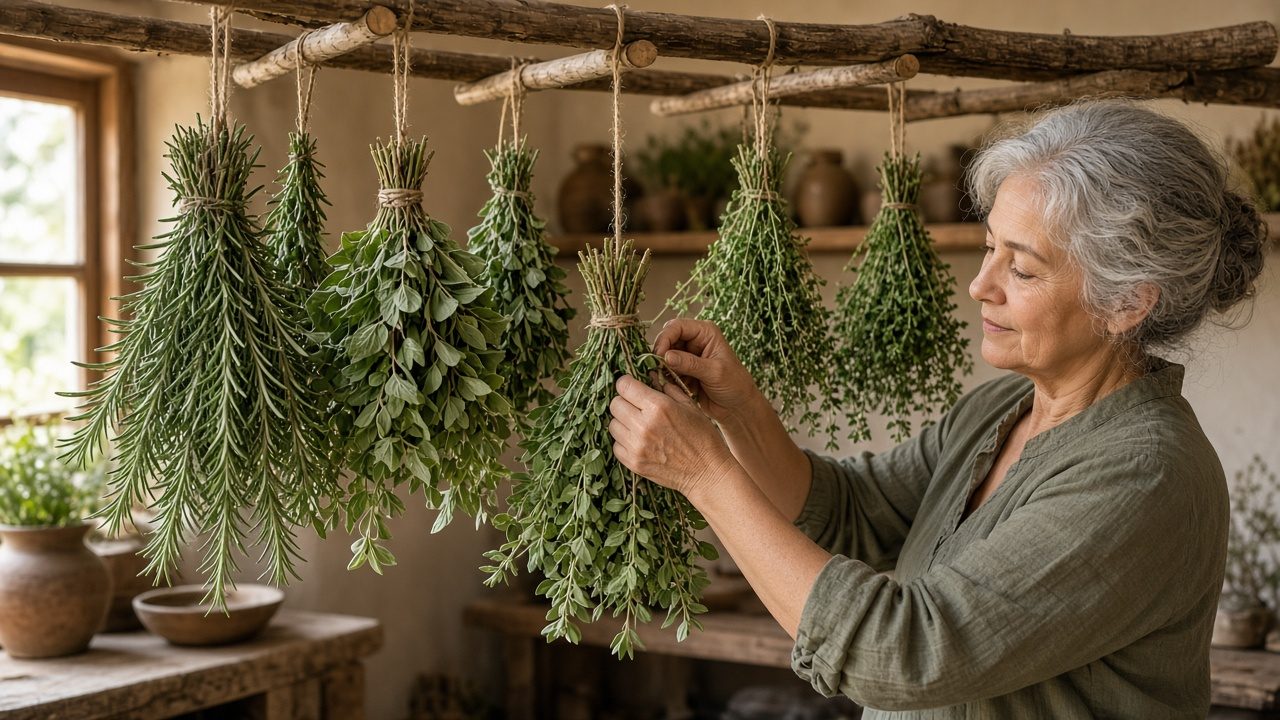
Air drying is free and simple, and it works best for sturdy, low-moisture herbs. It typically takes one to a few weeks depending on humidity and the herb.
Step by step
- Gather stems into small bundles of about five to ten stems so air can circulate.
- Tie the stems with string or a rubber band, which tightens as stems shrink.
- Place the bundle upside down inside a paper bag with several holes punched in the sides, with the stems sticking out of the top. The bag catches falling leaves and keeps off dust and light.
- Tie the bag closed around the stems.
- Hang the bags in a warm, dry, dark and well-ventilated room.
- Check every few days and remove any moldy pieces.
Drying screens
Loose leaves or flowers can be dried on a clean window screen or mesh rack in a single layer. Turn them every day or two.

Method 2: Food Dehydrator
A dehydrator is the most reliable choice for high-moisture herbs and humid climates because it dries quickly at a controlled, low temperature.
Step by step
- Preheat the dehydrator to a low temperature. The NCHFP suggests roughly 95 to 115 degrees Fahrenheit, with somewhat higher temperatures in very humid areas.
- Spread leaves or small sprigs in a single layer on the trays.
- Dry for one to four hours, checking often.
- Remove herbs as soon as leaves crumble.
Lower temperatures help keep the aromatic oils that give herbs their flavor and scent. Follow your dehydrator’s instructions for herb settings.

Method 3: Oven Drying
Oven drying works when you have no dehydrator, but it is harder to keep the temperature low enough, so flavor can suffer.
Step by step
- Set the oven to its lowest setting.
- Spread herbs in a single layer on a baking sheet.
- Prop the oven door slightly open so moisture can escape.
- Check frequently and stir gently; drying may take a few hours.
- Remove herbs as soon as they are crisp.
Gas ovens with pilot lights and ovens with very low settings work best. Watch carefully, because herbs scorch quickly.

Method 4: Microwave Drying
The microwave can dry a small handful of herbs in minutes, which is useful for a quick batch.
Step by step
- Place a single layer of clean, dry leaves between two paper towels.
- Microwave on high for about one minute.
- Check the leaves, then continue in short bursts of 20 to 30 seconds until they are dry and brittle.
- Let them cool before storing.
Microwaves vary widely in power, so watch closely. Never leave the microwave unattended, and do not use paper towels made from recycled paper, which may contain metal fragments.

How to Tell When Herbs Are Dry
Herbs are fully dry when the leaves crumble easily between your fingers and the stems snap rather than bend. Any herb with remaining moisture can mold in storage.
A simple jar test
Put a few dried leaves in a sealed glass jar for a day. If condensation appears on the inside of the glass, the herbs need more drying time.

How to Store Dried Herbs
Proper storage keeps dried herbs flavorful for months. Light, heat, air and moisture all break down the aromatic oils.
Storage tips
- Use airtight containers. Glass jars with tight lids or other sealed containers work well.
- Keep leaves whole. Strip leaves from stems but crumble them only when you cook, since whole leaves keep flavor longer.
- Store in a cool, dark place. A cabinet away from the stove, dishwasher and sunny windows is ideal.
- Label and date. Write the herb name and date on each jar.
- Use within about a year. Dried herbs are safe beyond that, but the NCHFP and extension guides note that flavor fades over time.
How to tell if dried herbs are still good
Crush a little between your fingers and smell it. Strong aroma means good flavor. If the scent is faint and the color has faded to dull brown, replace it.
Cooking with dried herbs
Dried herbs are more concentrated than fresh. A commonly used ratio is about one teaspoon of dried herb for every tablespoon of fresh. Add dried herbs earlier in cooking so their flavor has time to bloom.

Common Herb Drying Mistakes
A few habits cause most failed batches. Avoiding them saves time and herbs.
- Bundles that are too big. Thick bundles trap moisture in the center and can mold. Keep them small.
- Drying in sunlight. Direct sun fades color and breaks down aromatic oils. Choose a dark spot.
- Too much heat. High oven or dehydrator temperatures cook herbs and drive off flavor.
- Damp storage. Jarring herbs before they are completely dry invites mold.
- Humid rooms. Kitchens with steam and bathrooms are poor places to hang herbs.
- Crushing too early. Grinding leaves before storage shortens their shelf life.
- Forgetting labels. Many dried green herbs look alike in a jar, so label and date every container.

How to Freeze Herbs
Freezing preserves the fresh flavor of tender herbs better than drying, though the leaves turn soft and dark when thawed. Frozen herbs work well in cooked dishes, soups and sauces.
Freezing methods
- Whole sprigs: Spread clean, dry sprigs on a tray, freeze, then transfer to a labeled freezer bag.
- Ice cube trays: Chop herbs, pack them into ice cube trays, cover with water and freeze. Pop out cubes and store them in a bag.
- Chopped and bagged: Chop herbs, pack them flat in a freezer bag and break off what you need.
Herbs frozen in oil are a popular option. See the safety note below before making them.

How to Store Fresh Herbs
Fresh herbs last longer when you match storage to the type of herb.
Tender herbs
Treat parsley, cilantro and mint like flowers: trim the stems, stand them in a jar with an inch of water, cover loosely with a bag and refrigerate. Change the water every few days.
Basil
Basil dislikes cold and can blacken in the refrigerator. Many cooks keep it on the counter in a jar of water, out of direct sun.
Hardy herbs
Wrap rosemary, thyme, sage and oregano loosely in a slightly damp paper towel, place them in a bag or container, and refrigerate.

Food Safety: Herbs and Garlic in Oil
Herbs and garlic stored in oil can create conditions for Clostridium botulinum, the bacteria that cause botulism, because oil keeps out oxygen and fresh herbs can carry spores. The NCHFP and USDA advise that homemade herb or garlic oils be refrigerated and used within a few days, or frozen for longer storage. Never keep homemade herb-infused oil at room temperature.
Using dried herbs in oil lowers the risk, but follow tested guidance from the NCHFP when preparing infused oils.

Ways to Use Your Dried Herbs
Home-dried herbs make everyday cooking and self-care rituals more personal.
- Make your own seasoning blends, such as an Italian-style mix of oregano, basil and thyme.
- Brew dried mint, lemon balm or chamomile into tea.
- Rub dried rosemary and thyme on vegetables before roasting.
- Fill small jars as simple homemade gifts.
Adding more herbs and spices is an easy way to flavor vegetables and grains with less salt, a goal in our tips on how to improve your diet. For traditional uses of individual plants, browse our list of the most useful herbs in apothecary, or learn about anise hyssop, a fragrant herb that dries well for tea.

Frequently Asked Questions
What is the best way to dry fresh herbs?
For low-moisture herbs such as oregano, thyme and rosemary, air drying in small bundles works well. High-moisture herbs such as basil, mint and lemon balm dry more reliably in a dehydrator at a low temperature, according to the NCHFP.
How long does it take to air dry herbs?
Air drying usually takes one to a few weeks, depending on the herb, the size of the bundles and the humidity in the room.
How do you know when herbs are fully dry?
Leaves should crumble easily and stems should snap. Seal a few in a glass jar for a day; condensation means they need more drying.
How long do dried herbs last?
Dried herbs stay safe for a long time, but they have the best flavor within about a year. Smell them before use: a faint aroma means they have lost flavor.
Is it better to freeze or dry basil?
Freezing usually preserves more of basil’s flavor than drying. Chop it and freeze it in ice cube trays with water, or follow tested guidance if freezing in oil.
Can I store fresh herbs in oil at room temperature?
No. Homemade herb or garlic oils can support botulism bacteria. Refrigerate and use them within a few days, or freeze them.

Sources
- National Center for Home Food Preservation, University of Georgia. Drying Herbs.
- National Center for Home Food Preservation. Flavored vinegars and oils.
- U.S. Department of Agriculture. Food safety guidance on garlic and herbs in oil.
- University of Minnesota Extension. Harvesting and preserving herbs.
- Penn State Extension. Drying herbs.
- Colorado State University Extension. Drying herbs.